If you have been standing in the pet store aisle staring at $15 treat bags wondering what is actually inside them, you are not alone. Millions of American dog owners are making the switch to homemade dog biscuits, and for good reason. When you bake for your dog at home, you know every single ingredient that goes into each bite.

This recipe takes that idea and keeps it beautifully simple: just three wholesome ingredients, one silicone Pupsicle mold, and about 35 minutes of your time. The result is a batch of golden, crunchy, peanut butter dog biscuits shaped like little paws or bones that your pup will absolutely lose their mind over. No preservatives, no mystery fillers, no guesswork.
Let’s get baking.
What Is a Pupsicle Mold and Why Use One?
A Pupsicle mold is a food-grade silicone mold designed specifically for making dog treats at home. The term originally comes from the Woof Pupsicle toy and treat system, but today the phrase “Pupsicle mold” is widely used to describe any silicone dog treat mold used for baking or freezing homemade pet treats.
These molds typically come in fun shapes like:
- Dog bone cavities
- Paw print designs
- Mini bone rows
- Round disc shapes that fit inside the Pupsicle interactive toy
Why a Silicone Pupsicle Mold Is Perfect for Dog Biscuits
Most dog treat recipes call for a rolling pin, cookie cutters, and a flat baking sheet. That method works fine, but using a silicone mold is faster, cleaner, and gives you consistent biscuit sizes every single time. Here is why the Pupsicle mold is a game changer for homemade biscuits:
| Benefit | Explanation |
| No rolling required | Press the dough directly into cavities |
| Consistent sizing | Every treat bakes evenly and comes out the same size |
| Perfect for portion control | Especially helpful for small or medium dog breeds |
| Easy release | Flexible silicone pops biscuits out without breaking them |
| Oven and freezer safe | Use the same mold for baked biscuits or frozen treats |
| Easy cleanup | Most are dishwasher safe |
Silicone Pupsicle molds are rated safe for temperatures ranging from -40°F to 446°F, which means you can use them in the oven for baking and the freezer for frozen treat recipes without buying two separate tools.
The 3 Ingredients You Need
This is where the recipe really shines. You only need three ingredients, and there is a good chance you already have all of them in your kitchen right now.
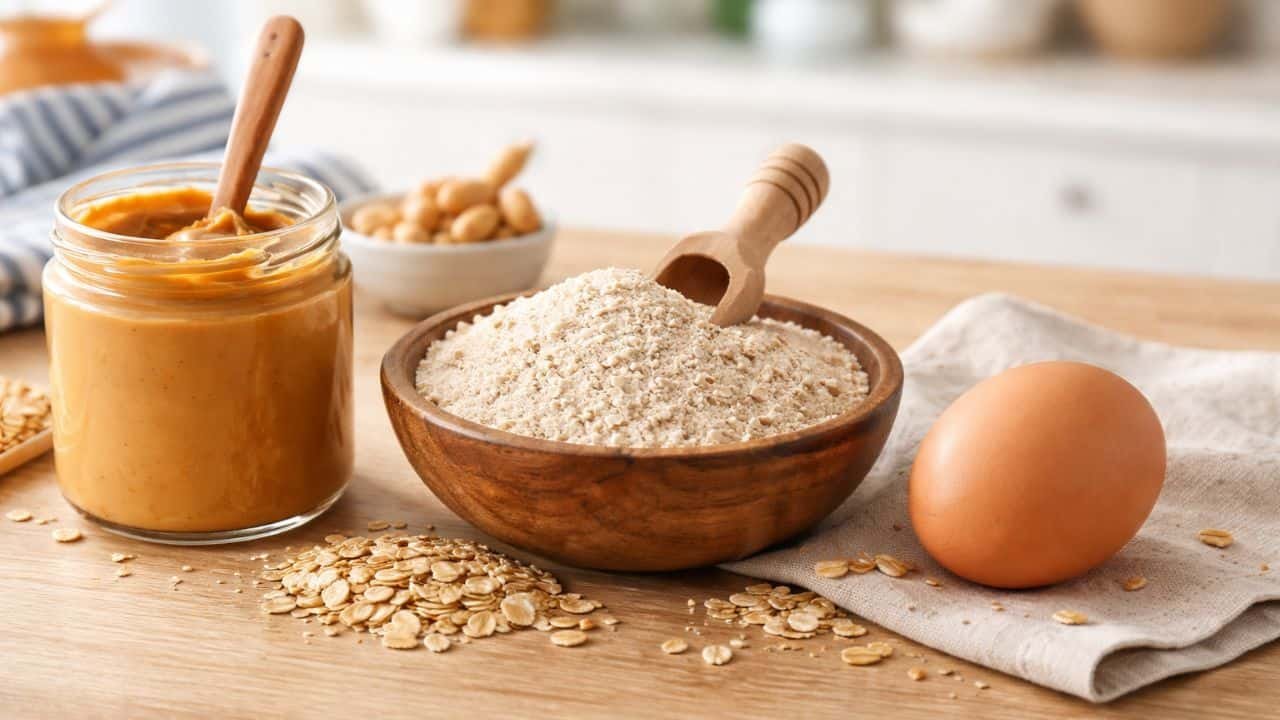
1. Natural Peanut Butter (1/2 cup)
Peanut butter is the star of this recipe for a very good reason. Dogs absolutely love the smell and taste of it, and in its natural form, it offers real nutritional value including healthy fats, protein, and vitamins B and E.
What to look for on the label:
- Ingredients should read: peanuts, or peanuts and salt
- No added sugar, no hydrogenated oils
- Absolutely no xylitol
Xylitol is an artificial sweetener found in some reduced-sugar and “natural” peanut butter brands. It is extremely toxic to dogs, even in small amounts. Always read the label before using any peanut butter in a dog treat recipe.
Popular dog-safe peanut butter brands widely available across the US include Smucker’s Natural, Teddie Natural, and 365 Whole Foods Market Organic Peanut Butter, though ingredient lists can change, so always double check before buying.
2. Oat Flour (1 cup)
Oat flour is the binder in this recipe. It holds the dough together, gives the biscuits their structure, and makes for a slightly crunchy texture once baked.
Why oat flour over wheat flour?
Oat flour is naturally easier on a dog’s digestive system compared to refined white flour. It is also an excellent source of fiber and provides a slower-digesting carbohydrate. For dogs with wheat sensitivities, oat flour is a particularly smart swap.
How to make oat flour at home in 2 minutes:
You do not need to buy a special bag of oat flour. Simply add one and a quarter cups of rolled oats or old-fashioned oats to a blender or food processor and pulse until it becomes a fine, powdery flour. Run it for about 60 seconds and you are done. You will end up with roughly one cup of oat flour. Certified gluten-free oats are the best choice if your dog has a grain sensitivity.
3. One Large Egg
The egg is your binding agent. It brings the peanut butter and oat flour together into a workable dough that holds its shape when pressed into the Pupsicle mold and bakes up nicely in the oven.
Eggs also add a modest protein boost to each biscuit, and dogs generally find the smell of egg very appealing.
Equipment You Will Need
Before you start, gather the following:
- Silicone Pupsicle mold (paw print, bone, or disc shapes all work great)
- Mixing bowl (medium sized)
- Fork or spatula for mixing
- Baking sheet
- Wire cooling rack
- Measuring cups
- Airtight storage container
That is the complete equipment list. No stand mixer, no rolling pin, no cookie cutters needed.
Step-by-Step Recipe: 3-Ingredient Peanut Butter Dog Biscuits Using a Pupsicle Mold
Prep Time: 10 minutes Bake Time: 22 to 25 minutes Cool Time: 15 minutes Total Time: About 50 minutes Yield: Approximately 12 to 16 biscuits (depending on mold cavity size)
Ingredients
- 1/2 cup natural peanut butter (xylitol-free, no added sugar)
- 1 cup oat flour (store-bought or homemade from rolled oats)
- 1 large egg
Instructions
Step 1: Preheat Your Oven
Set your oven to 350°F. Place the silicone Pupsicle mold on a flat baking sheet. This makes it much easier to transfer the mold to and from the oven without spilling.
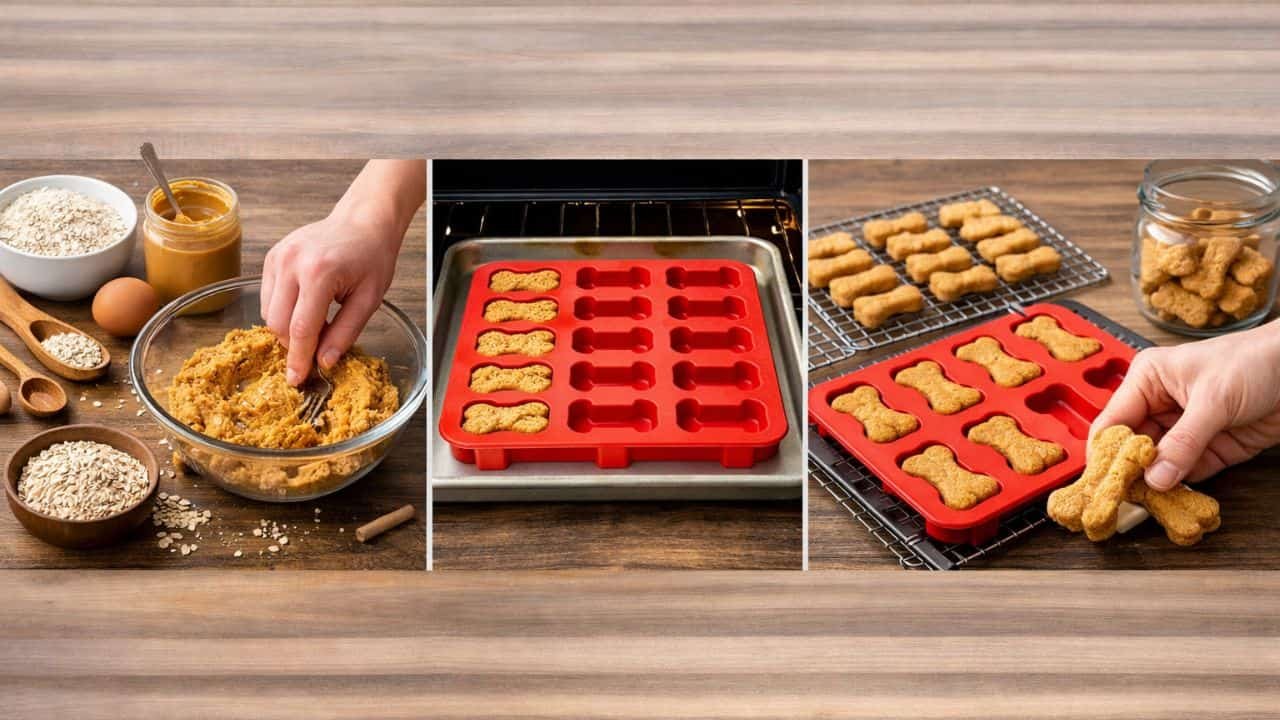
Step 2: Mix the Dough
In a medium mixing bowl, crack the egg and lightly whisk it with a fork. Add the peanut butter to the bowl and stir it together with the egg until they are fully combined. The mixture will look like a thick, slightly glossy paste.
Add the oat flour and mix with a spatula or your hands until a firm, slightly sticky dough forms. It should not be crumbly or wet. If the dough feels too dry, add one teaspoon of water at a time until it comes together. If it feels too sticky to handle, sprinkle in a little extra oat flour.
Step 3: Press Dough Into the Pupsicle Mold
Take a small ball of dough, about the size of a large grape, and press it firmly into each cavity of your Pupsicle mold. Use your thumb or the back of a spoon to pack it in evenly and smooth out the top. You want the dough to fill the cavity completely so the biscuits come out with clean, defined shapes.
Do not overfill. The dough does not rise much, but slight overfilling can cause the tops to puff unevenly.
Step 4: Bake
Slide the baking sheet with the filled mold into the preheated oven. Bake for 22 to 25 minutes. The biscuits are done when the tops look dry, the edges are lightly golden, and the treats feel firm to the touch.
Thicker cavities may need the full 25 minutes. Thinner, smaller mold cavities may be done closer to 20 minutes. Keep an eye on them after the 20-minute mark.
Step 5: Cool Completely
Remove the mold from the oven and place it on a wire rack. Let the biscuits cool inside the mold for 10 to 15 minutes before trying to pop them out. Rushing this step can cause the biscuits to break.
Once you can handle the mold comfortably, gently flex the silicone and push each biscuit up from the bottom. They should release cleanly.
Allow the biscuits to cool completely on the rack before storing or serving. Warm biscuits trap steam, which creates moisture in the storage container and can shorten their shelf life.
Step 6: Serve and Store
Once fully cooled, give your pup their well-earned treat. Store the remaining biscuits in an airtight container in the refrigerator for up to two weeks, or freeze them for up to three months.
Dough Troubleshooting Guide
| Problem | Likely Cause | Fix |
| Dough is crumbly and won’t hold | Too much oat flour or egg is too small | Add water one teaspoon at a time |
| Dough is too sticky to press | Peanut butter has too much oil | Add extra oat flour one tablespoon at a time |
| Biscuits came out too soft | Underbaked or removed too soon | Bake 3 to 5 minutes longer |
| Biscuits broke when removing from mold | Removed while still warm | Let cool in mold for at least 15 minutes |
| Biscuits are pale on top | Oven temp too low or bake time too short | Verify oven calibration and bake longer |
How to Adjust the Recipe for Different Dog Sizes
The Pupsicle mold size you use will naturally affect the treat size. Here is a general guide to help you match biscuit size to your dog:

Small Dogs (Under 20 lbs)
Use a mini paw or mini bone Pupsicle mold with small individual cavities. Press only a marble-sized amount of dough into each cavity. One biscuit per treat session is plenty for small breeds like Chihuahuas, Yorkies, and Shih Tzus.
Medium Dogs (20 to 55 lbs)
A standard multi-cavity Pupsicle mold with medium-sized bone or paw shapes works perfectly. One to two biscuits per treat session is appropriate. Labs, Bulldogs, and Cocker Spaniels fall in this range.
Large and Extra-Large Dogs (55 lbs and Up)
Use a larger Pupsicle mold designed for big dogs. You can also press dough into multiple cavities and serve two to three biscuits at once. Golden Retrievers, German Shepherds, and Great Danes will appreciate a more substantial treat.
Ingredient Swap Options
One of the best things about a three-ingredient recipe is how easy it is to customize without disrupting the formula. Here are smart swaps that keep the dough workable while introducing new flavors or accommodating dietary needs.
Swapping the Peanut Butter
- Pumpkin puree works beautifully as a peanut butter replacement for dogs with nut allergies or fat sensitivities. Use plain canned pumpkin, not pie filling.
- Sunflower seed butter is another allergy-friendly option. Just confirm it contains no xylitol or added sweeteners.
- Mashed sweet potato adds natural sweetness and fiber and creates a slightly softer biscuit texture.
Swapping the Oat Flour
- Whole wheat flour is a classic substitute and creates a crunchier biscuit. Use it cup for cup.
- Coconut flour works for grain-free biscuits but absorbs much more liquid. If using coconut flour, reduce the amount to 1/3 cup and add a splash of water to compensate.
- Brown rice flour is a gentle, easily digestible option for dogs with grain sensitivities.
Using the Egg vs. Going Egg-Free
If your dog has an egg allergy, try replacing the egg with two tablespoons of plain, unsweetened applesauce or an additional tablespoon of peanut butter. The dough will be slightly softer, so chill it in the refrigerator for 20 minutes before pressing it into the mold.
Storing Homemade Peanut Butter Dog Biscuits the Right Way
Homemade treats do not contain the preservatives found in commercial products, which means proper storage matters more than most people realize.
Room Temperature: Store biscuits in an airtight container at room temperature for up to five days if your kitchen does not get very warm or humid.
Refrigerator: An airtight container in the refrigerator keeps these biscuits fresh for up to two weeks. This is the best everyday storage option for most households.
Freezer: Arrange the cooled biscuits in a single layer on a parchment-lined baking sheet and freeze for one hour. Then transfer them to a zip-lock freezer bag or airtight container. They will stay fresh for up to three months. Pull a few out the night before to thaw in the refrigerator, or let them sit at room temperature for about 30 minutes before serving.
Why Making Dog Biscuits at Home Is Worth It
A lot of American dog owners feel guilty about the ingredient lists on commercial dog treats. Between preservatives, artificial colors, and ingredients that seem more suited to a chemistry lab than a kitchen, it makes sense to question what is going into your dog’s body on a daily basis.
Homemade biscuits solve that problem completely. You control every ingredient. You know the peanut butter is xylitol-free because you bought it and read the label yourself. You know the oat flour is fresh. You know the egg came from your refrigerator.
Beyond safety, there is a real cost argument too. A half cup of natural peanut butter, a cup of oat flour, and a single egg cost well under two dollars at any grocery store in the US. A quality bag of peanut butter dog biscuits at most pet stores runs anywhere from $8 to $15 for a comparable amount. The math is obvious.
And then there is the joy of it. Watching your dog sniff the kitchen while these are baking, thumping their tail against the floor, waiting with entirely unreasonable levels of enthusiasm for a treat they have never tasted before, that is one of the best parts of having a dog.
Safety Tips to Keep Every Biscuit Dog-Safe
Before you bake, run through this quick safety checklist:
- Check the peanut butter label for xylitol every single time, even if it is a brand you have bought before. Formulas change.
- Confirm the oats you use to make oat flour have no added flavoring, sweeteners, or cinnamon. Plain, unsweetened rolled oats only.
- If you are making these for a puppy under 8 weeks old, consult your vet before introducing any new treat.
- Dogs with pancreatitis, diabetes, or known food allergies should have their treats approved by a veterinarian before you introduce anything new, even something as simple as this.
- Always introduce new treats gradually. Give one biscuit the first day and watch for any digestive changes before offering more.
Frequently Asked Questions
Can I use regular peanut butter instead of natural peanut butter?
It is best to stick with natural peanut butter. Conventional peanut butter brands often contain added sugar, partially hydrogenated oils, and sometimes xylitol in their reduced-fat versions. Ingredients like added sugar and hydrogenated oils are not immediately toxic to dogs but offer no nutritional benefit and can contribute to weight gain over time. Natural peanut butter, where the only ingredients are peanuts, is the safer and healthier choice.
Do these biscuits need to be refrigerated?
They do not need to be refrigerated for the first four to five days if kept in an airtight container in a cool, dry spot. However, since homemade treats contain no preservatives, refrigeration is strongly recommended if you plan to use them over more than a week. For longer storage, freezing is the best option.
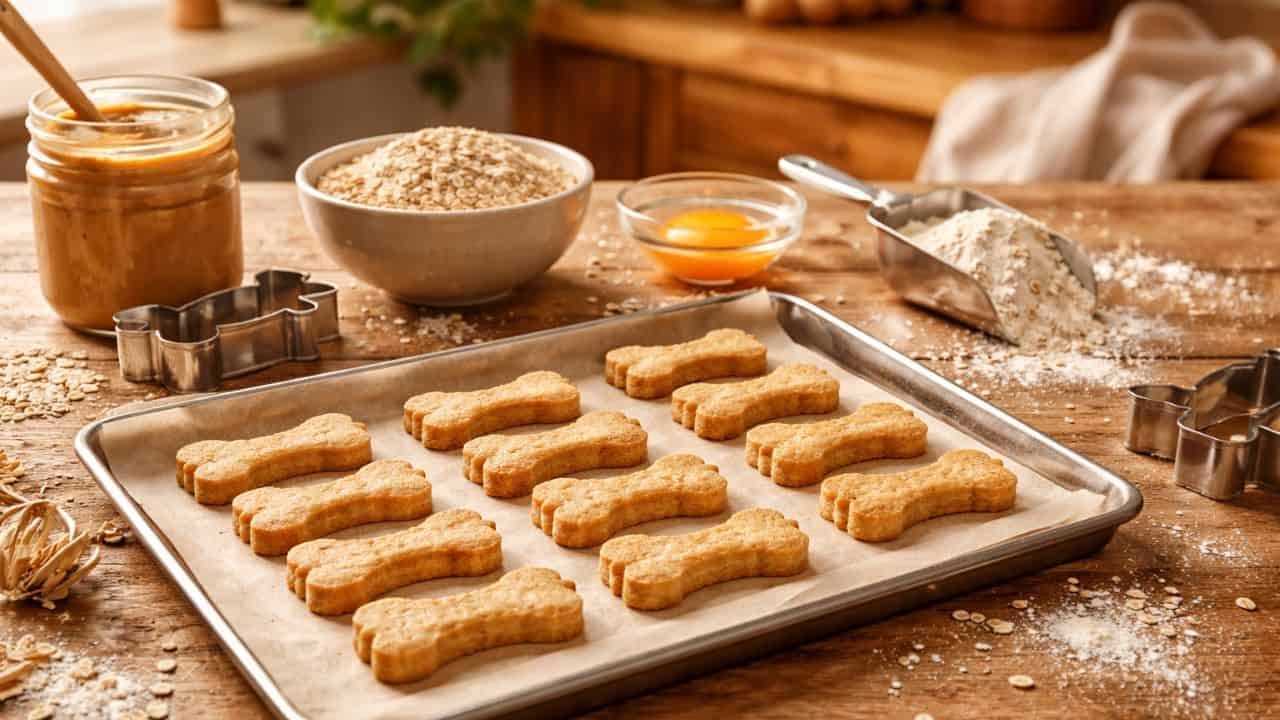
Can I make this recipe without a Pupsicle mold?
Absolutely. If you do not have a silicone mold, you can roll the dough out to about one-third inch thickness on a lightly floured surface and use a bone-shaped cookie cutter, a round biscuit cutter, or even a sharp knife to cut the treats into squares. The recipe works exactly the same way.
Why are my biscuits soft even after cooling?
Soft biscuits are almost always a sign of underbaking. Silicone molds hold heat a little differently than a flat baking sheet, so the bottom of the biscuit may take longer to firm up. Try baking for an additional five minutes, or after removing from the oven, pop the individual biscuits (already unmolded) onto a parchment-lined baking sheet and return them to the turned-off oven for another 10 minutes as the oven cools. This dries them out beautifully without burning.
How many biscuits can I give my dog per day?
Treats of any kind, including homemade ones, should make up no more than 10 percent of a dog’s daily caloric intake. For a 30-pound dog, that works out to roughly two or three of these small biscuits per day, depending on the size of your mold cavities. Use treats as rewards during training or as occasional bonding moments, not as meal replacements.
Can puppies eat these peanut butter dog biscuits?
For puppies older than 12 weeks, these biscuits are generally considered safe in small amounts. However, the hard, crunchy texture of a fully baked biscuit may be difficult for very young puppies. To make a softer version, reduce the baking time by about five minutes and allow the treats to cool fully. You can also slightly underbake them intentionally for a chewier, more puppy-friendly texture. Always check with your veterinarian when introducing new foods to a young puppy.
Can I double this recipe?
Yes, and it is actually a great idea. Simply double all three ingredients and work in batches if your mold has fewer than 20 cavities. The extra dough keeps in the refrigerator wrapped in plastic wrap for up to 48 hours, so you can bake a second batch the following day.
Is oat flour the same as oatmeal?
No, but they come from the same source. Oatmeal is cooked rolled oats eaten as a hot cereal. Oat flour is raw rolled oats that have been ground into a fine powder. When making oat flour at home for this recipe, use dry, uncooked rolled oats and blend them until they reach a flour-like consistency. Do not use instant oatmeal packets, which often contain added sugar, salt, and flavoring that are not appropriate for dogs.